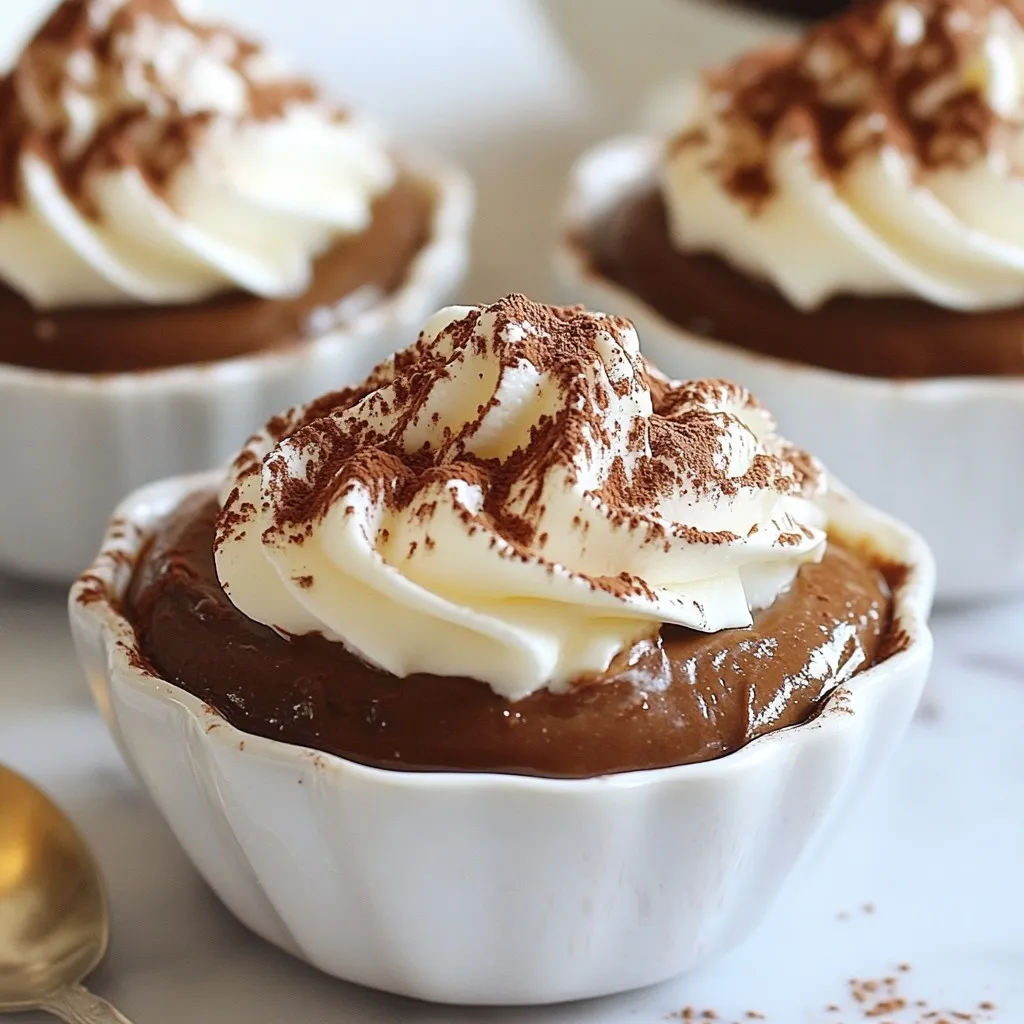
Indulge in the rich, velvety delight of Chocolate Espresso Mousse Cups! This dessert combines dark chocolate and fresh espresso for a taste that’s simply divine. Perfect for impressing guests or treating yourself, it’s easy to make and incredibly satisfying. In this post, I’ll guide you through the simple steps to create these luscious cups, share tips for perfect texture, and offer some fun flavor variations. Get ready to whip up a treat that’ll thrill your taste buds!
Why I Love This Recipe
- Decadent Flavor: This chocolate espresso mousse is a delightful combination of rich dark chocolate and bold espresso, making it a perfect dessert for chocolate lovers.
- Light and Airy Texture: The incorporation of whipped cream and beaten egg whites gives this mousse a luxuriously light and fluffy texture that melts in your mouth.
- Elegant Presentation: Served in individual cups and garnished with grated chocolate or cocoa powder, this dessert looks as good as it tastes, making it perfect for special occasions.
- Easy to Make: Despite its sophisticated appearance, this mousse is surprisingly simple to prepare, requiring minimal ingredients and just a little time to chill.
Ingredients
Main Ingredients
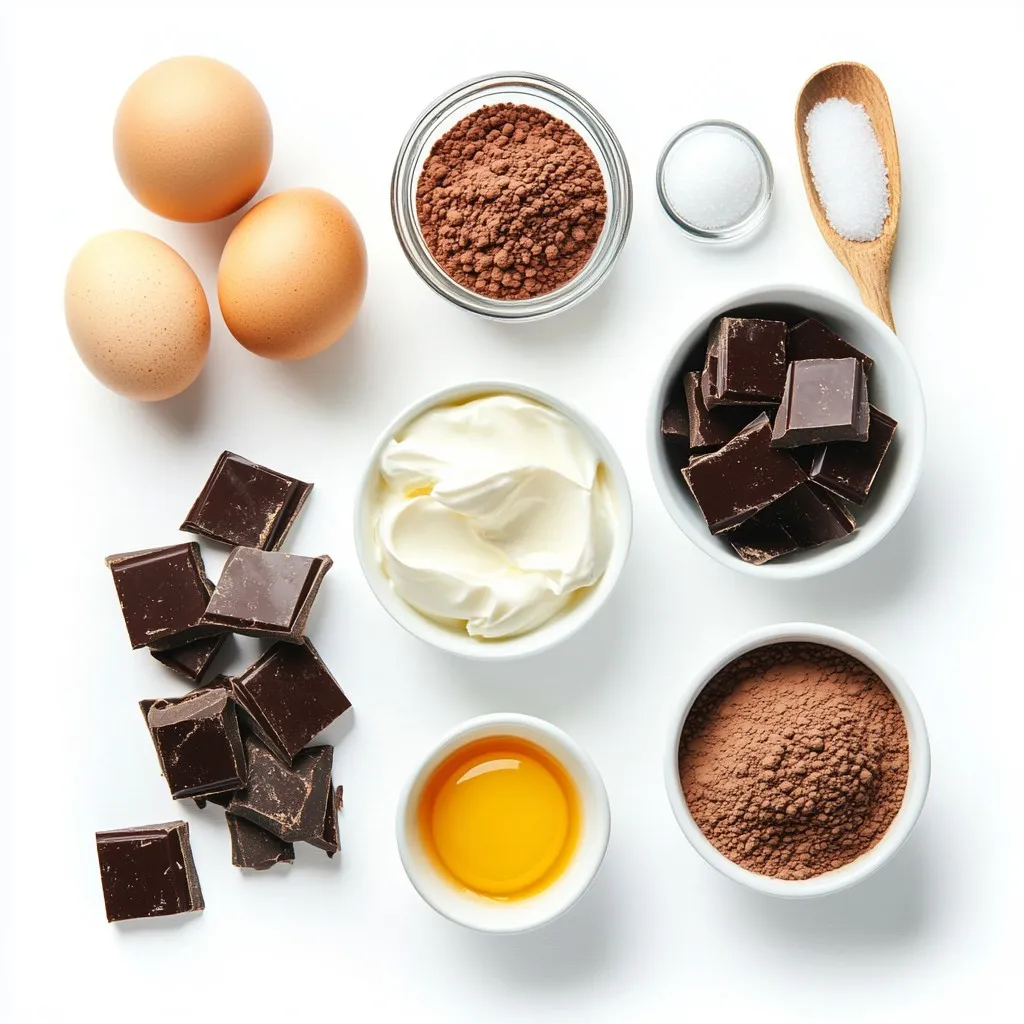
– 200g dark chocolate (70% cocoa), finely chopped
– 3 tablespoons freshly brewed espresso, cooled
– 4 large eggs, separated
Additional Ingredients
– 1/4 cup granulated sugar
– 1/2 teaspoon vanilla extract
– 1 pinch of salt
– 1/2 cup heavy cream
Garnishes
– Grated chocolate
– Cocoa powder
When making Chocolate Espresso Mousse Cups, you want to choose quality ingredients. The dark chocolate gives a rich flavor. I prefer chocolate that is at least 70% cocoa for depth. The espresso adds a lovely coffee note that pairs well with the chocolate.
Eggs play a key role. We use the yolks for creaminess and the whites for fluff. This mix creates a light texture that melts in your mouth. Granulated sugar adds sweetness and balances the deep flavors. Vanilla extract enhances the taste, making it more complex.
Heavy cream is essential for a smooth finish. Whipping it gives the mousse that light, airy feel. For garnishes, grated chocolate or cocoa powder not only looks pretty but adds an extra touch of flavor. Each element works together to create this delicious treat.
Step-by-Step Instructions
Melting the Chocolate
To start, you need to melt the dark chocolate. You can use two methods here:
– Double Boiler Method: Place a medium heat-proof bowl over a pot of simmering water. Make sure the bowl does not touch the water. Add the finely chopped chocolate to the bowl. Stir until it melts completely and is smooth.
– Microwave Method: Put the chopped chocolate in a microwave-safe bowl. Heat it in 30-second intervals. Stir in between each interval until the chocolate is fully melted.
Once melted, mix in the cooled espresso. Let the mixture cool slightly at room temperature.
Egg Yolk Mixture Preparation
Now, let’s prepare the egg yolk mixture. In a large mixing bowl, add the egg yolks, granulated sugar, and vanilla extract.
– Whisking Technique: Use a whisk to mix. You want to combine these ingredients until they become pale, thick, and creamy. This should take about 2-3 minutes.
Achieving the right texture is key here. Your mixture should look smooth and fluffy.
Combining Mixtures
Next, it’s time to combine the chocolate and yolk mixtures.
– Adding Chocolate to Yolks: Slowly pour the melted chocolate-espresso mix into the egg yolk mixture.
– Ensuring the Mixture Remains Smooth: Whisk continuously while adding. This helps prevent the eggs from scrambling. Set this rich mixture aside.
Beating and Folding Egg Whites
Now we will beat the egg whites.
– Techniques for Stiff Peaks: In a clean, dry bowl, add the egg whites and a pinch of salt. Use an electric mixer to beat them until stiff peaks form. The peaks should stand straight up when you lift the beaters.
– Importance of Gentle Folding: Gently fold one-third of the beaten egg whites into the chocolate mixture. This lightens it. Then, fold in the rest in two more additions. Be careful to keep the fluffiness.
Whipping the Cream
Let’s whip the cream.
– Signs of the Right Consistency: In another bowl, whip the heavy cream using an electric mixer. You want soft peaks to form. The cream should feel thick but smooth.
– Incorporating into the Mousse: Gently fold the whipped cream into the chocolate mixture. Keep folding until no white streaks remain. This step is crucial for a light and airy mousse.
Chilling and Serving
Now it’s time to chill and serve.
– Portion Sizes and Serving Cups: Spoon the mousse into individual serving cups or ramekins. You can layer it or keep it smooth on top.
– Chilling Time and Final Touches: Cover each cup with plastic wrap. Refrigerate for at least 2 hours. This helps the mousse firm up. Just before serving, sprinkle grated chocolate or cocoa powder on top for a beautiful finish.
Tips & Tricks
Perfecting the Mousse Texture
Folding is key to a light mousse. It mixes air into the chocolate mix. Here’s how to do it right:
– Use a rubber spatula for gentle folding.
– Fold from the bottom up.
– Turn the bowl as you fold.
For fluffy mousse, follow these tips:
– Be sure egg whites form stiff peaks before folding.
– Mix whipped cream in slowly and carefully.
– Avoid over-mixing to keep that airy feel.
Ingredient Substitutions
Don’t have dark chocolate? You can use:
– Semi-sweet chocolate for a sweeter taste.
– Milk chocolate for a creamier mousse.
For a non-dairy option, try:
– Coconut cream instead of heavy cream.
– Almond milk whipped cream for a lighter texture.
Serving Suggestions
Pair your mousse with fresh fruits like:
– Raspberries or strawberries for tartness.
– Bananas for a sweet touch.
For creative presentation ideas:
– Layer mousse with fruits in clear cups.
– Use small cups with fun colors for a pop.
– Add mint leaves on top for a fresh look.
Pro Tips
- Use Quality Chocolate: The quality of chocolate significantly affects the flavor of your mousse. Opt for high-quality dark chocolate with at least 70% cocoa for a rich taste.
- Temperature Matters: Make sure the espresso is cooled before adding it to the chocolate to prevent the chocolate from seizing up.
- Don’t Rush the Folding: When incorporating the whipped cream and egg whites into the chocolate mixture, take your time. Gentle folding helps maintain the light and airy texture of the mousse.
- Chill Thoroughly: Allow the mousse to chill for at least 2 hours, but if possible, refrigerate it overnight for the best texture and flavor development.
Variations
Flavor Infusions
You can make your mousse even more exciting. Adding spices like cinnamon or nutmeg brings warmth to the chocolate. Just a pinch can change the whole flavor. You can also experiment with different espresso flavors. Try a hazelnut or vanilla espresso for a fun twist.
Dietary Variations
If you’re looking for vegan options, swap eggs with aquafaba. This is the liquid from canned chickpeas. It whips up nicely and adds fluffiness. Use coconut cream in place of heavy cream for a rich texture. You can also make gluten-free adaptations by using gluten-free chocolate. Just check the labels to be sure.
Chocolate Type Choices
The type of chocolate you choose makes a big difference. You can use milk chocolate for a sweeter mousse or white chocolate for a lighter taste. Combining different types can also work well. Try mixing dark and milk chocolate for balance. Each choice will change the mousse’s flavor and feel.
Storage Info
How to Store Mousse Cups
To keep your mousse cups fresh, use airtight containers. Glass or plastic containers work well. Make sure they seal tightly. This keeps out air and moisture. Place the mousse cups in the fridge. They will stay good for up to four days.
Freezing Mousse
Freezing mousse is a great option. Use freezer-safe containers or silicone molds. This helps maintain the mousse’s smooth texture. Before freezing, press plastic wrap against the surface. This stops ice crystals from forming. To thaw, place the mousse in the fridge overnight. Avoid using the microwave, as it can ruin the texture.
Shelf Life
Mousse cups taste best within four days. After this, they may lose flavor and texture. Signs of spoilage include an off smell or change in color. If you see any signs, it’s best to discard them. Always trust your senses when checking food.
FAQs
Can I use instant espresso?
Yes, you can use instant espresso in this recipe. Just mix it with hot water to rehydrate it. Instant espresso will give a strong coffee flavor. However, fresh brewed espresso adds a richer taste.
What if I don’t have a double boiler?
If you lack a double boiler, use a heat-proof bowl over a pot of simmering water. Ensure the bowl does not touch the water. You can also melt chocolate in the microwave. Heat it in short bursts to prevent burning.
How long can I keep chocolate mousse?
You can store chocolate mousse in the fridge for up to 3 days. Keep it in airtight containers. If you notice any change in texture or smell, it’s best to discard it.
Can I make this ahead of time?
Yes, you can prepare chocolate mousse a day before serving. Just cover it well and chill it. This lets the flavors meld beautifully.
Is it necessary to use eggs in mousse?
Eggs are key for a classic mousse texture. They provide richness and help the mousse rise. If you want an egg-free version, look for recipes that use aquafaba or silken tofu instead.
Making chocolate mousse is a fun journey into dessert-making. You learned about the main ingredients, like dark chocolate and eggs, and how to combine them carefully. Each step is key to getting that perfect texture. Use my tips to create your ideal mousse. Don’t forget to try different flavors and presentations for a unique touch. Follow my storage advice to enjoy your mousse longer. With this guide, you’re equipped to impress with your chocolate mousse skills. Now, it’s time to get cookin