Get ready to brighten your day with my delicious Cranberry Orange Scones with Glaze! These scones are perfect for breakfast or a sweet treat anytime. With just a handful of simple ingredients, you can create a burst of flavor that will amaze your taste buds. In this post, I’ll guide you step-by-step through the process, ensuring your scones are flaky and delightful. Let’s dive into baking these flavorful treats together!
Why I Love This Recipe
- Delicious Flavor Combination: The sweet and tart flavors of cranberries paired with the bright citrus notes of orange create a refreshing and delightful experience in every bite.
- Easy to Make: This scone recipe comes together quickly, making it perfect for a last-minute treat or for a cozy weekend breakfast.
- Perfectly Flaky Texture: The technique of incorporating cold butter ensures that these scones are light and flaky, just as a good scone should be.
- Beautiful Presentation: With a simple glaze and optional garnishes, these scones look as good as they taste, making them ideal for entertaining guests.
Ingredients
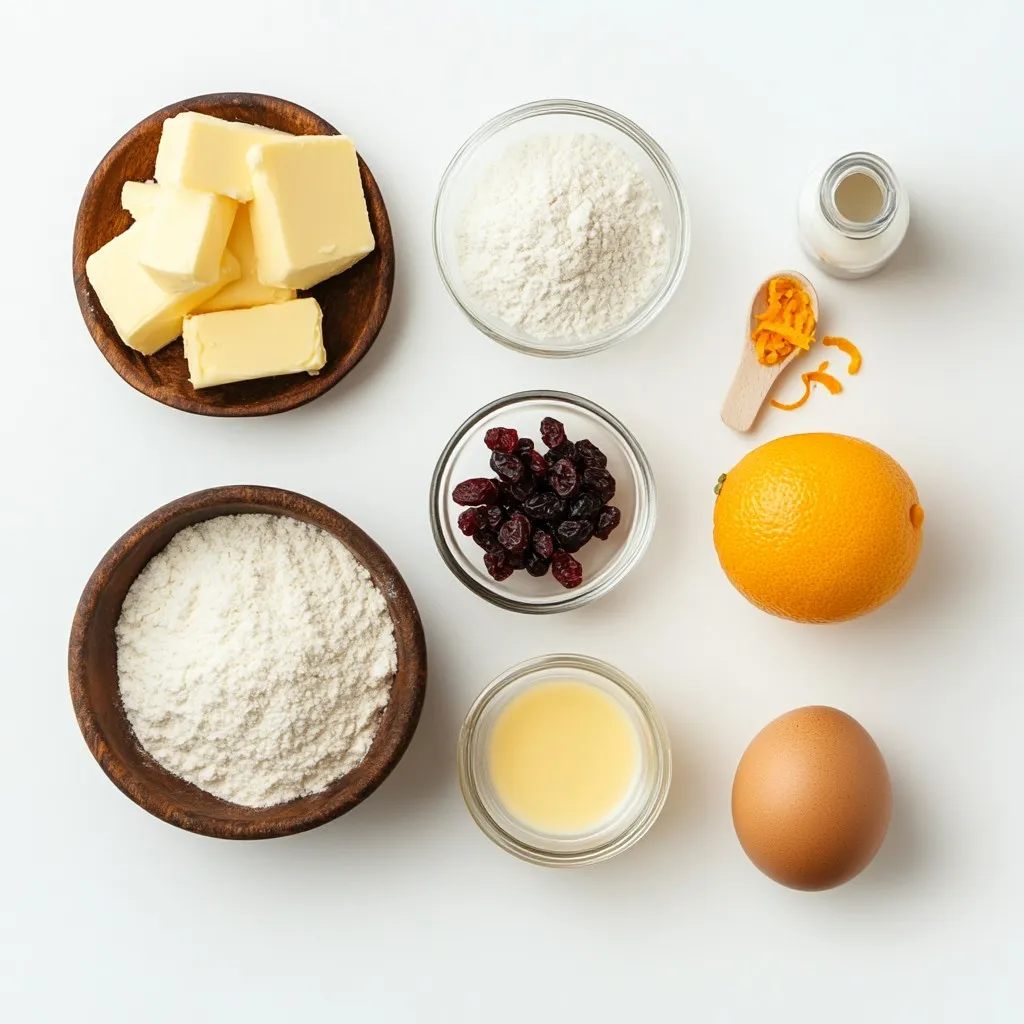
List of Main Ingredients
– 2 cups all-purpose flour
– 1/4 cup granulated sugar
– 1 tablespoon baking powder
– 1/2 teaspoon salt
– 1/3 cup cold unsalted butter, cut into small cubes
– 1/2 cup dried cranberries
– Zest of 1 large orange (about 1 tablespoon)
– 1/2 cup heavy cream
– 1 large egg, at room temperature
– 1 teaspoon vanilla extract
Ingredients for Glaze
– 1 cup powdered sugar
– 2 tablespoons fresh orange juice
– 1 tablespoon milk
Kitchen Tools Required
– Mixing bowls
– Pastry cutter or fingertips
– Baking sheet
– Parchment paper
– Knife or pizza cutter
This list has everything you need to make delicious cranberry orange scones. Each ingredient plays a role in creating the perfect balance of sweet and tart flavors. The all-purpose flour gives structure, while the butter adds a rich, flaky texture. Dried cranberries provide bursts of tartness, and orange zest brightens every bite.
For the glaze, powdered sugar, fresh orange juice, and milk create a sweet finish. The right kitchen tools will make your baking easier and more fun. Gather everything, and you are ready to start baking these delightful scones!
Step-by-Step Instructions
Prepping the Oven and Baking Sheet
First, preheat your oven to 400°F (200°C). This ensures even baking. While the oven heats up, grab a baking sheet. Line it with parchment paper. This will help the scones come off easily later.
Mixing Dry Ingredients
In a large mixing bowl, combine 2 cups of all-purpose flour, 1/4 cup of granulated sugar, 1 tablespoon of baking powder, and 1/2 teaspoon of salt. Whisk these together well. You want them evenly mixed for the best flavor.
Incorporating Butter and Adding Flavor
Now take 1/3 cup of cold, unsalted butter. Cut it into small cubes. Add the butter to the flour mix. Use a pastry cutter or your fingers to blend. Aim for coarse crumbs. Some larger pieces will help with flakiness. Next, add in 1/2 cup of dried cranberries and the zest of 1 large orange. Gently stir to mix these in.
Preparing the Wet Ingredients
In a separate bowl, whisk together 1/2 cup of heavy cream, 1 large egg, and 1 teaspoon of vanilla extract. Mix until it’s smooth and creamy. This blend adds moisture and flavor to the scones.
Forming and Cutting the Dough
Pour the wet mix into the dry ingredients. Use a spatula to fold them together gently. Stop when a shaggy dough forms. It’s okay if it looks a bit crumbly. Turn the dough onto a lightly floured surface. Knead it a few times until it holds together. Pat it into a disc that’s about 1 inch thick.
Now, grab a sharp knife or a pizza cutter. Slice the dough into 8 equal wedges. Place them on the lined baking sheet, leaving 2 inches between each scone.
Baking and Cooling the Scones
Bake the scones for 15-18 minutes. They should turn golden brown on top and lightly brown on the bottom. While they bake, get ready for the glaze. In a small bowl, mix 1 cup of powdered sugar with 2 tablespoons of fresh orange juice and 1 tablespoon of milk. Stir until smooth.
After baking, let the scones cool on the sheet for 5 minutes. Then, move them to a wire rack. Allow them to cool slightly before drizzling the glaze over the tops. Enjoy your delicious cranberry orange scones!
Tips & Tricks
Achieving the Perfect Texture
To prevent overmixing, mix the wet and dry ingredients gently. When you combine them, use a spatula and fold carefully. It’s okay if the dough is a little crumbly. Overmixing makes the scones tough, not tender.
For flaky scones, make sure your butter is cold. Cut it into small cubes and blend it into the flour until it looks like coarse crumbs. Leave some larger pieces for extra flakiness. This method helps create those lovely layers in each scone.
Glazing Tips for Presentation
When applying the glaze, use a spoon to drizzle it on top. Be sure to let the scones cool first. This helps the glaze stay nice and shiny. For a pretty finish, you can let the glaze drip down the sides.
To achieve the right consistency for the glaze, mix the powdered sugar with fresh orange juice and milk. Aim for a smooth texture that flows easily but is thick enough to stay on top. If it’s too runny, add more sugar. If it’s too thick, add a bit more juice.
Serving Suggestions
Pair these scones with a hot cup of tea or coffee. The bright orange and cranberry flavors work well with a nice herbal tea, too.
For garnishing, add a sprinkle of extra orange zest on top. You can also place a few whole cranberries around the scones for a festive touch. This makes your serving plate look colorful and inviting.
Pro Tips
- Use Cold Ingredients: For the flakiest scones, ensure your butter and cream are cold. This helps create steam during baking, resulting in a tender texture.
- Don’t Overmix: When combining wet and dry ingredients, mix just until the dough comes together. Overmixing can lead to tough scones.
- Experiment with Add-ins: Feel free to substitute dried cranberries with other fruits like blueberries or cherries for a different flavor twist.
- Glaze While Warm: Drizzle the glaze on the scones while they are still warm for better adhesion and a beautiful finish.
Variations
Flavor Additions
You can make your scones even more fun! Adding nuts like walnuts or pecans gives a nice crunch. Also, try chocolate chips for a sweet twist. They melt and add rich flavor. If you want to switch it up, use fresh cranberries instead of dried. Fresh ones give a tart kick and juicy texture. Just chop them if they are large to mix well into the dough.
Different Glaze Options
While the orange glaze is tasty, you can explore other options. For a chocolate glaze, melt chocolate chips with a splash of cream. It adds a rich finish. You can also try a lemon glaze for a zesty alternative. Just mix powdered sugar with lemon juice instead of orange. Adjust sweetness by adding more sugar or juice. This way, you can find the perfect flavor that suits your taste!
Dietary Modifications
If you need gluten-free scones, swap all-purpose flour for a gluten-free blend. Look for one that works for baking. For dairy-free scones, use coconut cream in place of heavy cream. You can also replace butter with coconut oil or a dairy-free butter substitute. These changes keep the taste delicious while meeting dietary needs. Enjoy scones that fit your lifestyle!
Storage Info
How to Store Scones
To keep your scones fresh, always use an airtight container. This helps prevent them from drying out. If you don’t have one, you can cover the scones with foil. But, this method may not keep them as fresh. Make sure the scones cool completely before storing them. This step helps reduce moisture, keeping them light and fluffy.
Freezing Instructions
You can freeze scones before baking for later use. To do this, shape the dough into wedges and place them on a baking sheet. Freeze them for about an hour until they are firm. Then, transfer the frozen scones to an airtight container or freezer bag. When you want to bake them, no need to thaw. Just bake them straight from the freezer, adding a few extra minutes to the baking time.
Shelf Life and Freshness
At room temperature, scones last about 2-3 days. Store them in an airtight container for best results. If you notice any signs of spoilage, like mold or off-smells, discard them. Fresh scones should have a light, sweet aroma and a soft texture. Enjoy your cranberry orange scones for as long as they stay fresh!
FAQs
How can I make these scones healthier?
You can make these scones healthier by reducing the sugar and fat. Here are a few tips:
– Sugar: Cut the granulated sugar to 2 tablespoons instead of 1/4 cup. You can use honey or maple syrup for a natural sweetener.
– Butter: Replace half the butter with unsweetened applesauce or Greek yogurt to cut down on fat.
– Flour: Use whole wheat flour instead of all-purpose flour for added fiber and nutrients.
By making these small changes, you keep the flavor while boosting the nutrition.
Can I make these scones ahead of time?
Yes, you can prepare these scones ahead of time. Here’s how:
– Dough Prep: Make the dough and shape it into a disc. Wrap it tightly in plastic wrap.
– Chill: Store the wrapped dough in the fridge for up to 24 hours.
– Bake Later: When ready to bake, slice the dough and bake straight from the fridge.
This method saves time on busy mornings or special occasions.
What should I do if my dough is too sticky?
If your dough is too sticky, don’t worry! Here are a few easy fixes:
– Flour: Lightly dust your hands and the work surface with flour. This helps manage stickiness.
– Chill: If the dough feels too warm, place it in the fridge for 10-15 minutes. Chilling makes it easier to handle.
– Blend: When mixing, don’t overwork the dough. Gently fold until combined to avoid extra stickiness.
These tricks help create a nice dough without frustration.
Can I substitute other fruits in this recipe?
Absolutely! You can use different fruits for varied flavors. Here are some great options:
– Blueberries: They add sweetness and are great in scones.
– Raspberries: These bring a tart twist and pair well with orange.
– Dried cherries: They provide a deep, rich flavor.
– Apples: Use diced apples for a fresh crunch.
Feel free to mix and match your favorite fruits to create unique scones!
In this post, I shared how to make flavorful scones using simple ingredients. You learned the key steps from mixing to baking, plus tips for a perfect finish. Remember to choose fresh ingredients and follow the steps closely for the best results. You can also experiment with flavors or dietary needs as desired. Enjoy your baking and the delicious scones that follow! Your kitchen will smell great, and everyone will love your treat