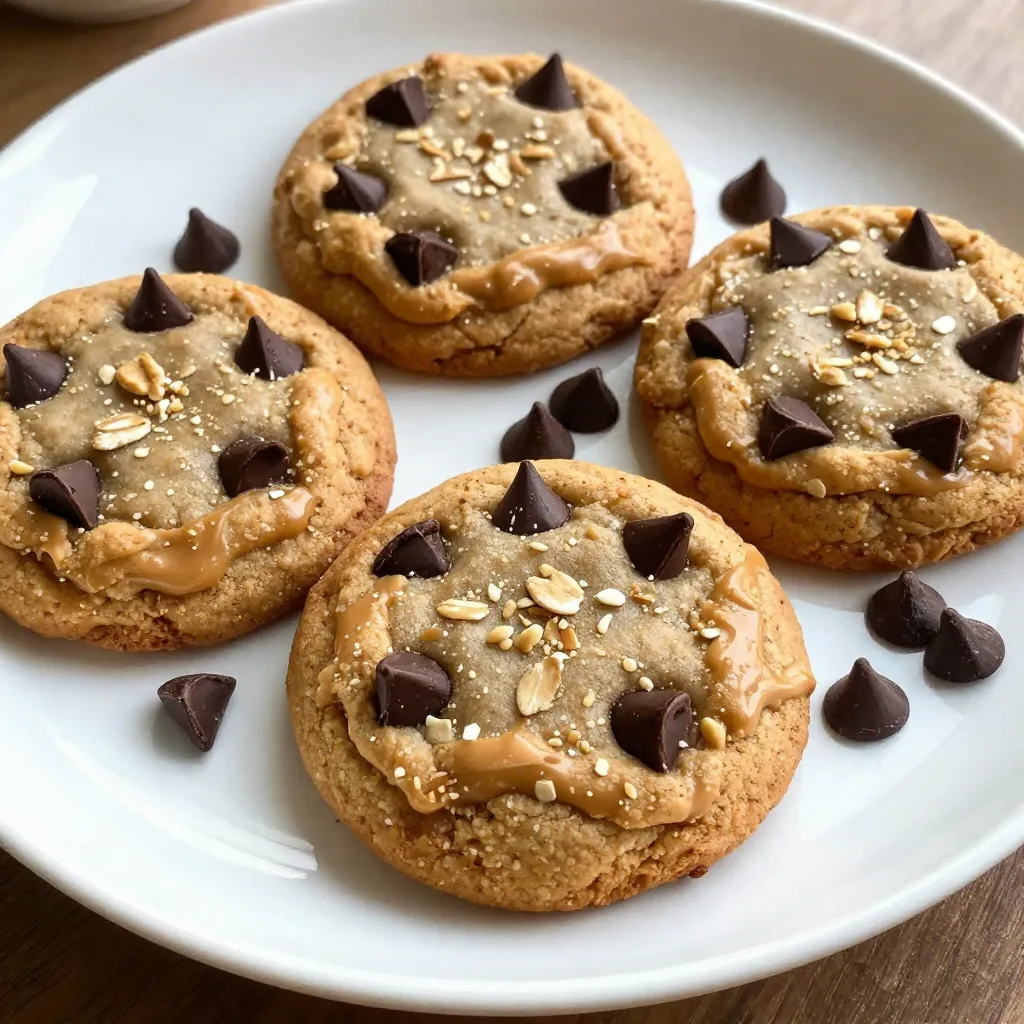
Get ready to indulge in the ultimate comfort treat: Peanut Butter Oatmeal Chocolate Chip Cookies! These cookies combine creamy peanut butter, hearty oats, and rich chocolate in every bite. I’ll guide you through each step to make them perfect. Whether you’re a seasoned baker or a beginner, this recipe will delight your taste buds. Ready to bake some magic? Let’s dive into the delicious world of these cookies!
Why I Love This Recipe
- Quick and Easy: This recipe takes just 10 minutes of prep time, making it perfect for a last-minute treat.
- Nutritious Ingredients: Packed with oats and peanut butter, these cookies provide a satisfying snack that’s both delicious and sustaining.
- Customizable: Feel free to add your favorite nuts or even swap the chocolate chips for dried fruit for a unique twist!
- Irresistible Flavor: The combination of creamy peanut butter and rich chocolate is a classic that everyone loves.
Ingredients
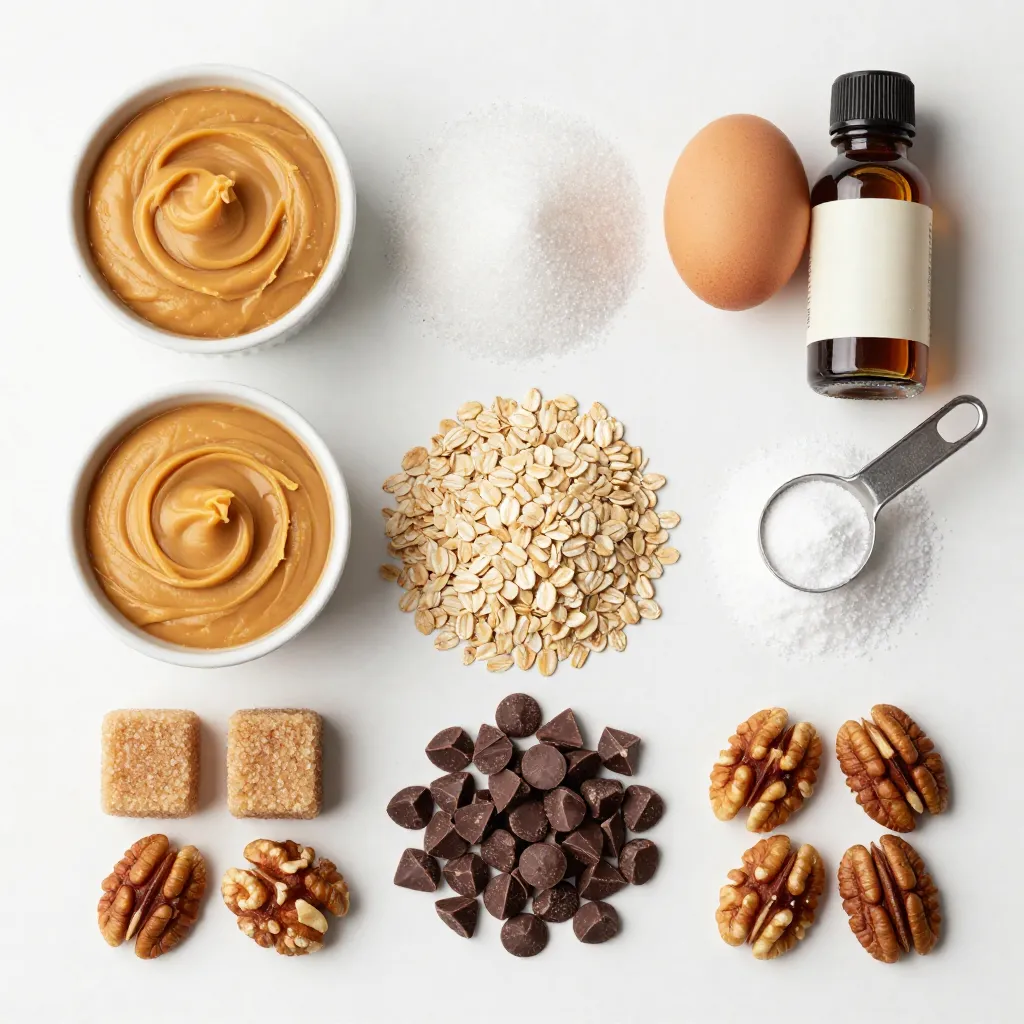
Detailed List of Ingredients
– 1 cup creamy peanut butter
– 1/2 cup packed brown sugar
– 1/4 cup granulated sugar
– 1 large egg
– 1 teaspoon pure vanilla extract
– 1 cup rolled oats
– 1/2 teaspoon baking soda
– 1/4 teaspoon fine sea salt
– 1/2 cup dark chocolate chips
– Optional: 1/4 cup chopped nuts
Ingredient Substitutions
Nut-free alternatives
You can use sun butter or soy nut butter. These options work well as they mimic peanut butter.
Sugar substitutes
Try using coconut sugar or maple syrup. They add sweetness without refined sugar.
Gluten-free options
For gluten-free cookies, use certified gluten-free oats. They ensure your cookies stay safe for gluten-sensitive eaters.
Step-by-Step Instructions
Prepping the Oven and Baking Sheet
– Preheat oven to 350°F (175°C).
– Line baking sheet with parchment paper.
Start by preheating the oven. This step is key for even baking. While the oven warms up, grab a baking sheet. Lining it with parchment paper helps the cookies not stick. This makes cleanup easy.
Making the Cookie Dough
– Creaming the peanut butter and sugars.
– Mixing in the egg and vanilla.
– Combining dry ingredients.
In a large bowl, mix the creamy peanut butter with brown sugar and granulated sugar. Use a hand mixer or a spatula to make it smooth. This mixture should be creamy with no lumps. Next, add one large egg and one teaspoon of pure vanilla extract. Mix well until everything is blended.
In another bowl, whisk together rolled oats, baking soda, and fine sea salt. This helps the dry ingredients mix evenly. Now, slowly add this dry mix to the wet mixture. Stir gently with a wooden spoon or spatula. Don’t overmix; just combine until you see no flour. Finally, fold in half a cup of dark chocolate chips, and if you want, add some chopped nuts too.
Baking the Cookies
– Portioning the dough onto the baking sheet.
– Baking time and checking for doneness.
– Cooling process after baking.
Now it’s time to shape the cookies. Use a tablespoon to scoop dough and drop it on the sheet. Leave about two inches between each scoop. This space lets them spread nicely. Bake in the preheated oven for about 10 to 12 minutes. Look for golden edges and soft centers to know they are done.
Once baked, take them out of the oven. Let the cookies cool on the baking sheet for five minutes. After that, move them to a wire rack. This step helps them cool completely and finish setting. Enjoy the aroma as they cool!
Tips & Tricks
Achieving the Perfect Cookie Texture
The temperature of your ingredients matters. Use peanut butter at room temp for easy mixing. This helps the mix come together smoothly. Cold eggs can also change the dough. Always let them warm up a bit first.
Mixing is key to the right texture. After adding dry ingredients, stir gently. This avoids overmixing, which can make cookies tough. You want a soft dough that holds shape but isn’t dry.
Flavor Enhancements
Spices can take your cookies to the next level. A dash of cinnamon or nutmeg adds warmth and depth. You can also try a splash of almond extract for a twist. Each addition brings a new flavor experience.
Different chocolates can change the taste, too. Dark chocolate chips give a rich touch. Milk chocolate adds creaminess, while white chocolate offers sweetness. Mix and match to find your favorite combo!
Presentation Tips
Serving cookies well makes them more inviting. A rustic wooden platter works great. It adds warmth and charm to your display. Scatter a few chocolate chips around for visual appeal.
For a fun touch, stack the cookies in a tower. Use small dessert cups for individual servings. You can also drizzle melted chocolate on top for a fancy look.
Pro Tips
- Use Natural Peanut Butter: Opt for natural peanut butter without added sugars or oils for a healthier option and a more authentic peanut flavor.
- Chill the Dough: For thicker cookies, chill the dough for 30 minutes before baking. This helps prevent spreading and results in a chewier texture.
- Check for Doneness: Cookies will continue to cook slightly after being removed from the oven. Look for lightly golden edges and soft centers for the perfect texture.
- Experiment with Mix-ins: Feel free to get creative! Add in dried fruits, coconut flakes, or different types of chocolate chips for a unique twist on the classic recipe.
Variations
Nutty Options
You can add a variety of nuts to your cookies. Chopped walnuts or pecans work great. They add crunch and flavor. If you want to make nut-free cookies, just skip the nuts. You can still enjoy the rich taste of peanut butter and chocolate.
Healthier Spin
To make these cookies healthier, switch to natural sweeteners. Try using honey or maple syrup instead of brown sugar. You can also add superfoods like flaxseeds. They boost nutrition and add a nice texture.
Flavor Combinations
Mixing flavors can make your cookies even better. Try adding mashed banana to the dough. It pairs well with peanut butter. You can also infuse coffee for a deeper taste. The chocolate and coffee combo is delightful.
Storage Info
Best Storage Practices
To keep your cookies fresh, store them in an airtight container. This helps maintain their soft texture. You can place parchment paper between layers to avoid sticking. If you live in a warm area, it’s better to store them in the fridge. In the fridge, they last longer but may become a bit firmer. Room temperature is fine too, but watch out for humidity.
Freezing Cookies
To freeze cookie dough, scoop it into balls and place them on a baking sheet. Freeze them for about two hours. Once firm, transfer the balls to a freezer bag. This way, you can bake fresh cookies anytime! When you’re ready, bake straight from the freezer. Just add a minute or two to the baking time. Enjoy warm cookies after coming out of the oven!
Shelf Life
These cookies stay fresh for about one week at room temperature. If refrigerated, they can last up to two weeks. Check for signs of spoilage, like an off smell or hard texture. If they feel dry or crumbly, it’s time to toss them. Always trust your senses when it comes to food safety!
FAQs
Can I use crunchy peanut butter instead of creamy?
Yes, you can use crunchy peanut butter. Crunchy peanut butter has bits of nuts in it. This gives your cookies a nice texture. The flavor remains the same, but the crunch adds fun. Just remember, it may change the smoothness of your cookies.
How do I know when my cookies are done baking?
Look for a few signs when baking. The edges should be lightly golden. The centers may look soft, but that’s okay. They will firm up as they cool. If you press gently and they spring back, they are done.
What can I use instead of eggs?
You can use several options if you need a vegan choice. Try one tablespoon of flaxseed meal mixed with three tablespoons of water. Let it sit for a few minutes to thicken. Applesauce or mashed banana works too. Each choice helps bind your cookies nicely.
In this post, we covered how to make tasty peanut butter cookies. I shared the key ingredients, easy steps, and helpful tips for success. You learned about ingredient swaps and variations to suit your taste.
Remember, the key to great cookies is mixing well and baking at the right time. Enjoy your baking journey and get creative with flavors and textures. I hope your cookie-making skills shin